1. FlywayDB

애플리케이션의 변경에 따라 DB 스키마의 변경이력을 관리하기 위한 목적으로 사용한다.

2. SpringBoot에서 제공하는 FlywayDB 관련설정

# FLYWAY (FlywayProperties)
flyway.baseline-description= #
flyway.baseline-version=1 # version to start migration
flyway.baseline-on-migrate= #
flyway.check-location=false # Check that migration scripts location exists.
flyway.clean-on-validation-error= #
flyway.enabled=true # Enable flyway.
flyway.encoding= #
flyway.ignore-failed-future-migration= #
flyway.init-sqls= # SQL statements to execute to initialize a connection immediately after obtaining it.
flyway.locations=classpath:db/migration # locations of migrations scripts
flyway.out-of-order= #
flyway.password= # JDBC password if you want Flyway to create its own DataSource
flyway.placeholder-prefix= #
flyway.placeholder-replacement= #
flyway.placeholder-suffix= #
flyway.placeholders.*= #
flyway.schemas= # schemas to update
flyway.sql-migration-prefix=V #
flyway.sql-migration-separator= #
flyway.sql-migration-suffix=.sql #
flyway.table= #
flyway.url= # JDBC url of the database to migrate. If not set, the primary configured data source is used.
flyway.user= # Login user of the database to migrate.
flyway.validate-on-migrate= #

baseline-version은 별도로 설정하지 않아도 된다.

버전을 별도로 지정하지 않는다면 설정항목을 변경하지 않아도 된다.

3. SpringBootApplication 설정

3.1. build.gradle: flywayDB 의존성 추가

/**
 * http://flywaydb.org/
 * FlywayDB: DB Schema version management tool
 */
compile "org.flywaydb:flyway-core"

3.2. application.yml: flywayDB properties 설정

spring:
  profiles: production
  profiles.include: logging-info, logging-daily
  datasource:
    initialize: false
    sql-script-encoding: UTF-8
    driver-class-name: org.h2.Driver
    url: jdbc:h2:file:~/.h2database/test-db;CACHE_SIZE=10240;DB_CLOSE_DELAY=-1;AUTO_SERVER=TRUE;DB_CLOSE_ON_EXIT=FALSE;LOCK_TIMEOUT=15000;MVCC=true;
    username: tester //sa 계정을 사용하지 않으려고...
    password: tester
  jpa:
    hibernate:
      ddl-auto: validate
logging:
  file: logs/tester.log
flyway:
  enabled: true
  encoding: UTF-8
  user: sa
  password:

3.3. V1__xxxx.sql 추가

CREATE SCHEMA IF NOT EXISTS "PUBLIC";
CREATE USER IF NOT EXISTS tester PASSWORD 'tester';
ALTER USER tester ADMIN TRUE;
GRANT ALL TO tester;
 
-- DDL 스크립트
....

파일명을 기준으로 하여 버전관리

version comment 사이는 __ 2개의 언더바로 구분지어야 한다.


1. 스프링부트 h2console 관련 설명

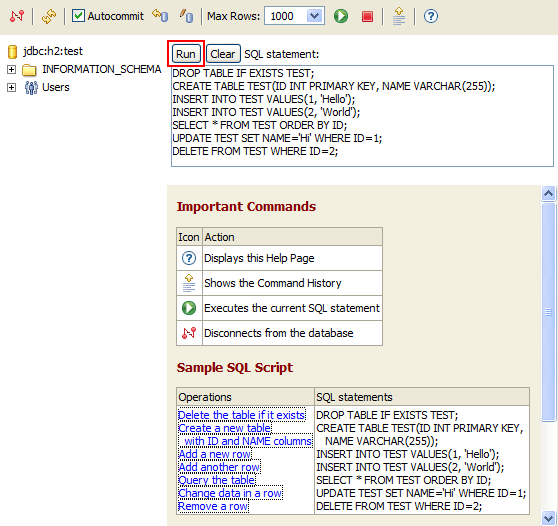
스프링부트 1.3.0 부터 h2console 기능을 제공한다.

개발자 개인개발환경(로컬local)에서 개발할 때 h2database를 Database로 사용하면 개발이 매우 용이해진다. 그리고 h2database에서는 데이터베이스에 에 접근할 수 있는 클라이언트를 제공하는데 그게 바로 h2console 이다.

이전버전에서 h2console을 사용하기 위해서는 다음과 같은 형태로 ServletRegistrationBean 으로 h2에서 제공하는 WebServlet을 서블릿빈으로 등록한다.

@Bean
public ServletRegistrationBean h2servletRegistration() {
    ServletRegistrationBean registration = new ServletRegistrationBean(new WebServlet());
    registration.addUrlMappings("/h2console/*");
    return registration;
}

스프링부트 1.3.0 부터는 @WebServlet, @WebFilter @WebListener 애노테이션을 선언한 클래스들을@ServletComponentScan으로 탐색하는 기능도 제공한다.

어쨌든~~ h2console은 기본적으로 애플리케이션의 데이터에 접근하는 부분이기 때문에 보안과 관련되어 있다. 그래서 스프링부트 1.3.0에 추가된 H2ConsoleAutoConfiguration 에서 기본보안에 대한 설정을 하는 부분도 볼 수 있다.

H2ConsoleSecurityConfiguration.java
@Configuration
@ConditionalOnWebApplication
@ConditionalOnClass(WebServlet.class)
@ConditionalOnProperty(prefix = "spring.h2.console", name = "enabled", havingValue = "true", matchIfMissing = false)
@EnableConfigurationProperties(H2ConsoleProperties.class)
@AutoConfigureAfter(SecurityAutoConfiguration.class)
public class H2ConsoleAutoConfiguration {
 
@Autowired
private H2ConsoleProperties properties;
 
@Bean
public ServletRegistrationBean h2Console() {
String path = this.properties.getPath();
String urlMapping = (path.endsWith("/") ? path + "*" : path + "/*");
return new ServletRegistrationBean(new WebServlet(), urlMapping);
}
 
@Configuration
@ConditionalOnClass(WebSecurityConfigurerAdapter.class)
@ConditionalOnBean(ObjectPostProcessor.class)
@ConditionalOnProperty(prefix = "security.basic", name = "enabled", matchIfMissing = true)
static class H2ConsoleSecurityConfiguration {
 
@Bean
public WebSecurityConfigurerAdapter h2ConsoleSecurityConfigurer() {
return new H2ConsoleSecurityConfigurer();
}
 
@Order(SecurityProperties.BASIC_AUTH_ORDER - 10)
private static class H2ConsoleSecurityConfigurer
extends WebSecurityConfigurerAdapter {
 
@Autowired
private H2ConsoleProperties console;
 
@Autowired
private SecurityProperties security;
 
@Override
public void configure(HttpSecurity http) throws Exception {
String path = this.console.getPath();
String antPattern = (path.endsWith("/") ? path + "**" : path + "/**");
HttpSecurity h2Console = http.antMatcher(antPattern);
h2Console.csrf().disable();
h2Console.httpBasic();
h2Console.headers().frameOptions().sameOrigin();
String[] roles = this.security.getUser().getRole().toArray(new String[0]);
SecurityAuthorizeMode mode = this.security.getBasic().getAuthorizeMode();
if (mode == null || mode == SecurityAuthorizeMode.ROLE) {
http.authorizeRequests().anyRequest().hasAnyRole(roles);
}
else if (mode == SecurityAuthorizeMode.AUTHENTICATED) {
http.authorizeRequests().anyRequest().authenticated();
}
}
 
}
 
}
 
}
2. h2console을 사용하기 위한 설정

h2console을 사용하는 방법은 간단하다. application.yml(혹은 application.properties) 파일에spring.h2.console.* 속성을 정의하면 된다. 여기서 정의하는 속성은

H2ConsoleProperties.java
@ConfigurationProperties(prefix = "spring.h2.console")
public class H2ConsoleProperties {
 
/**
 * Path at which the console will be available.
 */
@NotNull
@Pattern(regexp = "/[^?#]*", message = "Path must start with /")
private String path = "/h2-console";
 
/**
 * Enable the console.
 */
private boolean enabled = false;
 
public String getPath() {
return this.path;
}
 
public void setPath(String path) {
this.path = path;
}
 
public boolean getEnabled() {
return this.enabled;
}
 
public void setEnabled(boolean enabled) {
this.enabled = enabled;
}
 
}

spring.h2.console.* 가 제공하는 속성은 크게 두가지다.

# H2 Web Console (H2ConsoleProperties)
spring.h2.console.enabled=false # Enable the console.
spring.h2.console.path=/h2-console # Path at which the console will be available.

위의 속성에서 볼 수 있듯이 h2console은 기본은 비활성화 되어 있다.

spring.h2.console.enabled=true
spring.h2.console.path=/h2console

로 설정하면 h2console 사용을 위한 기본준비는 끝난다.

스프링부트 애플리케이션을 실행시키면 * h2console 로그인창이 뜨고 ** http://localhost:8080/h2console

h2console-loging

h2console

  • h2console 창이 뜨면 정상적으로 접근이 된 것이다.

h2console-success

h2console-success

3. h2console 로그인을 통과했는데 흰화면만 나온다면?

그런데 스프링시큐리티를 사용하고 있다면 흰화면만 나오고 화면이 뜨지 않을 수도 있다. 브라우저의 개발도구를 열어 콘솔창을 보면 다음과 같은 메시지를 볼 수 있다.

h2console-white

h2console-whitescreen

Load denied by X-Frame-Options: http://localhost:9090/h2console/header.jsp?jsessionid=62e96686014c88a9e644647c7a4bf069 does not permit framing. <알 수 없음>
Load denied by X-Frame-Options: http://localhost:9090/h2console/query.jsp?jsessionid=62e96686014c88a9e644647c7a4bf069 does not permit framing. <알 수 없음>
Load denied by X-Frame-Options: http://localhost:9090/h2console/help.jsp?jsessionid=62e96686014c88a9e644647c7a4bf069 does not permit framing. <알 수 없음>
Load denied by X-Frame-Options: http://localhost:9090/h2console/tables.do?jsessionid=62e96686014c88a9e644647c7a4bf069 does not permit framing. <알 수 없음>

스프링시큐리티에서 headers 에 있는 X-Frame-Options 옵션을 거부했기 때문에 발생한다.

그래서 스프링시큐리티 설정부분에서 아래와 같이 설정해버렸다.

@Override
    protected void configure(HttpSecurity http) throws Exception {
        http
            .authorizeRequests()
                //중략 
                .anyRequest().authenticated()
            .and()
                .headers()
                    .addHeaderWriter(new StaticHeadersWriter("X-Content-Security-Policy","script-src 'self'"))
                    .frameOptions().disable();
    }

개발하는 애플리케이션의 보안 정책에 따라서 상세하게 설정하자.

위와 같은 형태로 X-Frame-Options 옵션을 비활성화하면 h2console 화면에 접근이 가능하다.


스프링부트 1.3.0이 나오고 현재 개발중인 애플리케이션의 적용버전을 바로 업그레이드 했다.

스프링부트 1.2.6 에서 1.3.0 으로 변경사항은

  • 스프링 4.1 → 4.2.1

  • 스프링시큐리티 3 → 스프링시큐리티 4

    • thymeleaf-extra-springsecurity3 → thymeleaf-extra-springsecurity4

정도의 차이가 생기겠다.

현재 ViewTemplate로 타임리프Thymeleaf 를 사용중인데, 스프링시큐리티와 연동해서 사용자가 가진 권한에 따른 처리를 하기 위해서 thymeleaf-extra-springsecurity(<https://github.com/thymeleaf/thymeleaf-extras-springsecurity>) 를 추가적으로 사용한다.

3 버전에서 4 버전으로 변경되면서 권한을 가지고 있는지 체크하는 구문이 변경된 것으로 보인다. * 3 버전

<div sec:authorize="hasRole('ROLE_USER')"></div>
<div sec:authorize="hasAnyRole('ROLE_ADMIN', 'ROLE_MANAGER')></div>
  • 4 버전

<div sec:authorize="hasAuthority('ROLE_USER')"></div>
<div sec:authorize="hasAnyAuthority('ROLE_ADMIN', 'ROLE_MANAGER')></div>

Role이 Authority 로 변경된 듯 싶다. ㅡ_-)>

스프링시큐리티 설정에서 URL별 접근권한을 설정하는 부분에서 hasAuthority를 사용하고 있어서 혹시나 하고 써봤더니 적용된다. 스프링시큐리티 문서를 보니 hasRole 등 Role 을 접미사로 사용하는 메서드는 ROLE_이라고 하는 접두사를 사용한 권한을 체크하는 목적으로 사용하는 것으로 보인다.

흠…​ ㅡ_-)> ROLE_ 붙이기 싫어서 빼먹고 권한을 정의했는데, 4버전에서 먹통이 되는 현상을 발생시키다니…​

정리

스프링시큐리티 4 적용 후 hasRole이나 hasAnyRole이 적용되지 않는다면 권한에 ROLE_ 접미사를 붙였는지 확인해보자.

레퍼런스 문서를 보는게 제일 좋다.

참고


스프링부트 1.3.0이 출시되었다.

1.3에서 추가된 부분들의 주요사항들을 살펴보면:

  • Developer Tools

    새롭게 추가된 spring-boot-devtools 모듈은 개발시 경험을 향상시키는데 초점을 두고있다. 모듈이 제공하는 기능은:

    • 민감한 속성 기본(예를 들어 템플릿 캐시를 비활성화)

    • 애플리케이션 자동 재시작

    • LiveReload 지원(살아있는 상태에서 다시 읽기…​?) 애플리케이션을 종료하지 않고도 변경사항을 다시 읽어오는 것이 가능해짐

    • 원격 개발 지원(HTTP 터널을 통한 원격 갱신과 원격 디버그 지원)

    • 재시작 동안 HTTP session 영속화

      여유가 된다면 DevTools 에 관한 짧은 소개영상을 보자.

  • Caching Auto-configuration

    EhCache, Hazelcast, Infinispan, JCache (JSR 107) implementations, Redis 과 Guava을 위한 자동설정을 제공한다. 추가적으로 인-메모리 캐시 기반의 간단한 Map도 지원한다.

  • Fully executable JARs and service support

    메이븐Maven과 그레들Gradle 플러그인을 이용해서 리눅스/유닉스에서 다음과 같은 형태로 실행할 수 있는 완벽한 실행가능한 아카이브를 생성할 수 있다.

    $ ./myapp.jar

    거기서 더 나아가, init.d 혹은 systemd 서비스로 동작한다. init.d 서비스로 설치할 때는 심볼릭만 생성하면 된다.

    $ sudo link -s /var/myapp/myapp.jar /etc/init.d/myapp
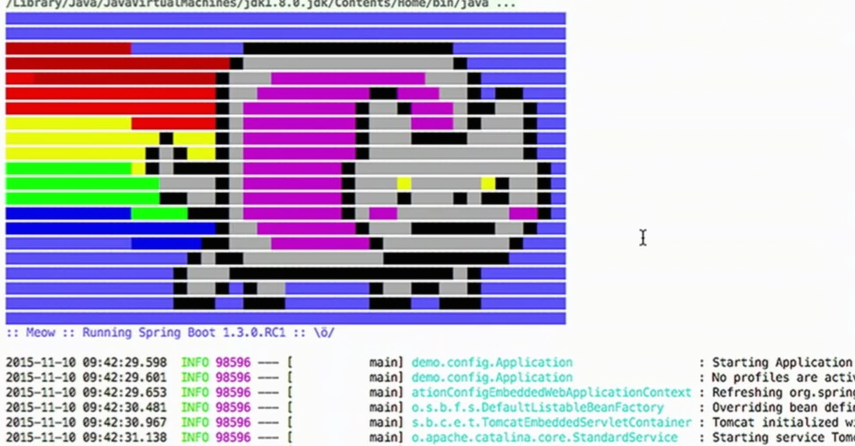
  • Color banners

    banner.txt 파일에 ANSI 칼라코드를 포함시킬 수 있다. 이런 미친 짓(?)도 가능하다.

    Meow
    Figure 1. color banner
  • Support for @WebServlet, @WebFilter and @WebListener annotations 내장 서블릿 컨테이너를 사용할 때,@ServletComponentScan을 사용하여 활성화시킨 경우 @WebServlet, @WebFilter  @WebListener 애노테이션을 사용한 클래스가 자동 등록된다.

  • Additional auto-configurations

    다음 항목들에 대한 자동설정을 제공한다. Cassandra OAuth2 Spring Session jOOQ SendGrid Artemis

  • Actuator Metrics

    측정metric 은 반출과 집계를 지원기능이 확장되었다. 추가적으로 자바8에 정의된 GaugeService CounterService 구현체(가능하다면 사용가능한)와 성능의 향상을 제공한다.

  • Update Endpoints and Health Indicators

    /logfile, /flyway  /liquibase 액츄에이터 엔드포인트를 포함하였고 엘라스틱서치, 이메일과 JMS health indicator를 지원한다.

  • Other changes

    다른 변경사항이나 향상된 기능들에 대해서는 릴리즈 노트를 살펴보라. 다음버전에서 삭제예정의 클래스와 메서드들도 찾아볼 수 있다.


+ Recent posts